Friday, December 7, 2012

Christmas Trees

The students have been working on Christmas crafts during art this last unit. We've made snowflakes (the traditional fold into a triangle, cut, then open to see what happens), Christmas cards, and Christmas trees. I saw a little girl's shirt that had this basic design in ribbon and decided to try it out in paper! Everyone loved it! It took most students about 45 minutes to an hour (over a two day period).
This is a first or second grade example, I'm not sure which, beside the inspiration, so cute!

Supplies needed:
Black piece of 9" x 12" construction paper
Green piece of 9" x 12" construction paper
Brown piece of construction paper: 1" x 2" or 2" x 2"
glue
Any extra pieces of paper/decoration you may want to add. A few of my older students added little ornaments, snow (white crayon), presents, etc.
Fold the green paper in half. Cut 1"-2" strips of paper along the fold (my pieces were quite irregular - no measuring involved and I told the students not to worry about exactness either, when have you seen a natural tree that was exact? Not very often!). Unfold the strips of paper and cut them along the fold.

You will need 10 of the half pieces. Fold each of these into a loop and adhere the ends together with a very small amount of glue and hold tight for a few seconds (my little ones count to 20). Then glue them in rows as shown in the picture. The star is just two triangles put together. I figured this would be the easiest for the students to create. The trunk is a piece about
1" x 2" or 2" x 2" brown construction paper.

Have fun!

Thursday, November 8, 2012

Trees - Inspired by Liz Tran

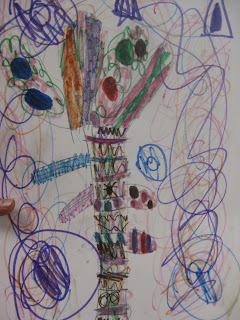
I love Liz Tran's artwork! She's one of my favorite artists, so I shared her tree paintings with the students on Wednesday. They loved her artwork too :) We discussed what the titles of the paintings are and possible meanings behind the title and paintings, what patterns they saw in the paintings, how trees are wider at one end and narrower at the other end, and anything else they observed. There were so many insightful comments! We had a great time discussing the paintings and making our own interpretations.
 
Today, the 3rd and 4th graders drew their trees and the 1st and 2nd graders colored the drawings they made yesterday.

They're awesome! Take a look for yourself:
2nd grader - Liz Tran named her paintings. The students were encouraged to do the same, although they did not have to. This student named her art work "happy, happy, happy, happy, happy" Love it!
2nd grader - although difficult to see, this student was the first one who had patterns within the stripes. He did an awesome job recreating this feature. The circles inside circles represent a cloud :)
2nd grader - this one is a great example of the many types of circles found in several of the tree paintings we viewed.
1st grader - great example of patterns within the stripes!
1st grader - I love all the dots in this one. It reminds me of a tropical paradise somewhere :)
1st grader - Love the colors in this one :)
1st grader - Great patterns in the stripes and a fabulous background!
1st grader - another great example of patterns within the stripes. The other students were highly impressed with this version. They kept complimenting the student on a job well done. It was super cute!

Tuesday, November 6, 2012

Mustache Fun!

My students and I made mustaches for Movember today :) We also learned about symmetry and asymmetry. Mustaches are usually symmetrical. Faces are also usually pretty symmetrical. Artists use symmetry in their art.

Here are some images I printed for them to use (images found on Google images):
 
This is the one that I printed and cut out to use as the right size. Then I used some of the following ideas and others that I can't find now along with the sizing of the first one (width-wise). The students LOVED them!


At the end, I connected pipe cleaners as a stick so the students could hold them up to their faces (it's what was available in the classroom supplies). After some trial and error, I found that if you cut a small piece of paper and wrapped and glued it around the pipe cleaner, then glued the paper to the paper, it's much easier and stays in place faster. Pipe cleaners don't like to be glued to things!

Here's a simple step by step of how I eventually decided to apply the pipe cleaners/sticks:

Wednesday, October 24, 2012

Art Room Ghosts!

(click on the image to make it bigger)

Hopefully, tomorrow, I'll be able to get some pictures of the students' ghosts :)

Friday, September 21, 2012

4th Grade Poinsettias


4th graders poinsettias - learning to draw and observe 3D objects along with the shadows they make. It was quite difficult, but most really liked that it was so difficult :) They used complementary color schemes.

Fall Leaves

Two examples of 2nd grade Fall Leaves; The students used leaf templates and traced them in a pattern. They had to have at least 5 leaves on their papers. Then we explored the color changes between yellow and red. Today, I even added gold glitter paint to the mix! I love the outcome :)

 1st grade example - this one and the next one are my favorite 1st grade examples :)

Friday, September 7, 2012

A New Year

During our first week of art this year, I emphasized the idea of making mistakes. Even professional artists make mistakes! Even professional artists don't like everything they create! As art students, it's OK to make mistakes and not like everything you make too!

We read the book, MoMA Make Art Mistakes: An Inspired Sketchbook for Everyone. The students sat on our new tiger striped rug. They each had a white board and marker. We explored a few of the activities in the book. At first they wanted to know how to draw what the activity was asking them to draw, i.e., "take a dot for a walk" - making a line. (Some had a dot and then a line squiggling out from it. A few drew a dot, then a lasso around the dot and a little stick figure holding the other end of the lasso, literally taking a dot for a walk. So fun!) I refused to give them any direction aside from repeating the sentence from the book.
.

The really amazing part of using this awesome book, is that the students really incorporated the lesson of making mistakes into their art all year. When a new student joined us and made a big deal out of a mistake, the students who had the make mistakes lesson would tell them about the lesson and show them the book, which was kept on the easel all year. It was really cute to hear students who used to make such a big deal out of a mistake teaching others that it is OK to make mistakes.

We also read The Dot (1-2 grade)

 and Ish (3-4 grade)

then continued the discussion of making mistakes and just doing our personal best. It's OK if we're not as good as the professionals. And, in fact, some of the professionals even look to children's art as inspiration for their own art!

Saturday, August 11, 2012

It's That Time Again!

Wow! Where did the summer go? I hope you all had a fabulous summer and are excited to create some awesome art this year! There are ever so many projects floating around in my mind and written down in my art notebook :) Is there anything specific that you'd like to do this year?

Here is a list of a few projects so far on our docket this year:

1. Artist/Art History Introductions
2. Painting
3. Batik prints
4. Drawing
5. Friday Fun Activities
6. Ceramics
7. Op-Art
8. Sculptures
9. Student Choice ?

Also, if your project is done each Friday, we will have Friday Fun activities. These will be student choice and will consist of specific projects/games that can be completed mostly independent of the teacher's help.

In order to earn Friday Fun activities, students must be done with their weekly project and earn Fun Friday tickets.

Friday Fun tickets are earned by listening during instructions, remembering to raise your hand to ask questions/answer questions, following project directions, helping classmates, being quiet in line and while working, and any and all good behavior.

The top five students may also earn Soaring Seagulls or Kisses from the principal.

From time to time a Fun Friday Ticket may be taken away, but hopefully more tickets will be earned. Students will help decide what actions will facilitate tickets being taken away.

Students will put their name on the ticket and keep it in their folder until Friday during instructions. Those earning the most tickets will pick their activity first and on down the line. Students with only a few tickets will be asked what they can do to earn more tickets the next week they have art class and then choose an activity that's left.

Friday Fun tickets will change colors every three weeks (students rotate through specialties every three weeks) so that it will be easy to tell when the tickets were earned.

Activities to choose from include:
1. Art Games - up to 4 students
2. Play dough - up to 8 students (two different tables)
3. Free draw - unlimited students
4. Make your own project using materials in the Fun Friday boxes (2 boxes - these are subject to change from time to time); e.g., coloring supplies, paper, scissors, and glue. - up to 8 students (two different tables)
5. Teacher's pet project - to be announced from time to time; e.g., spinning art, chalk and water, wheel thrown ceramics (only during ceramics unit), etc. - up to 4 students

Wednesday, May 9, 2012

Unmasked: Who Am I?

The students art show was tonight! It turned out perfectly :) The theme I choose was "Unmasked: Who am I? Adventures in the stages of portraiture and cultures around the world through masks" The students learned how to draw and paint portraits a month or so ago. Then, within the last three-four weeks, they learned about masks from around the world: Korea (my amazing friend MD taught my 1st graders, love!), Africa (Bubba came to visit - my little African mask JML brought back from S. Africa), Northwest Native North American (think lots of black and red with a splash of other colors, fabulous!), and Mayan (the funeral masks were quite popular with the students).


Friday, March 9, 2012

Art Show Project: Portraits

Here is a sampling of some of the art show portraits from 1st, 3rd, and 4th grades:

Ceramics Fresh from the Kiln

I checked the kiln before leaving school today. It was super hot still making the air wavy as I opened the top. Nestled inside where these fabulous treasures!
(There are two layers on the bottom half of the picture and only one layer on the top half of the picture.)
 Most of these treasures went home with their owners today. The broken ones will be sent to the ceramics hospital for the weekend :)

Sunday, March 4, 2012

Ceramics

My students are in the middle of two units right now: ceramics and portrait drawing/painting. On Thursday, the first batch of glazed ceramics went into the kiln. I kept praying that nothing would end up sticking to the kiln since some glaze jobs had been applied more generously than the directions stated. I am pleased to announce that everything came up cleanly (no sticking)! When I opened the top Friday morning, my eyes lit up at all the pretty, shiny objects! I was sooo excited for the students and they were super excited too! Now that the pieces are shiny, the students finally believe they are glass :)

 The filled kiln - three shelves - a different shelf per class
 Can you see the three layers?
The ceramic hospital - these pieces actually broke before they were bisque fired (as greenware). They are now on the mend :) The bottom left piece in this picture is the same one on the top right side of the first picture after it was glaze fired.

Thursday, February 23, 2012

First Grade Portraits

The end of year art show this year will feature masks and portraits. Currently, several classes are working on practice portraits before we move to the real deal of painted portraits starting next week! Since I finally remembered that I had my camera with me today, I took a few pics of the first graders' works in progress. Note that the eyes, nose, and mouth are pretty much where they should be on the face :)


Saturday, January 28, 2012

Robert Delaunay's Circular Forms

The most anticipated painting project has begun! For this project, we were inspired by Robert Delaunay's Circular Forms paintings. Here are a few student examples: