I love Liz Tran's artwork! She's one of my favorite artists, so I shared her tree paintings with the students on Wednesday. They loved her artwork too :) We discussed what the titles of the paintings are and possible meanings behind the title and paintings, what patterns they saw in the paintings, how trees are wider at one end and narrower at the other end, and anything else they observed. There were so many insightful comments! We had a great time discussing the paintings and making our own interpretations.
Today, the 3rd and 4th graders drew their trees and the 1st and 2nd graders colored the drawings they made yesterday.
2nd grader - Liz Tran named her paintings. The students were encouraged to do the same, although they did not have to. This student named her art work "happy, happy, happy, happy, happy" Love it!
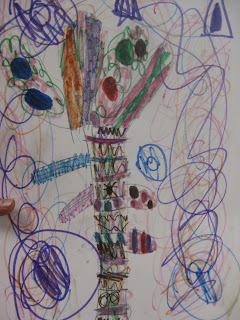
2nd grader - although difficult to see, this student was the first one who had patterns within the stripes. He did an awesome job recreating this feature. The circles inside circles represent a cloud :)
2nd grader - this one is a great example of the many types of circles found in several of the tree paintings we viewed.
1st grader - great example of patterns within the stripes!
1st grader - I love all the dots in this one. It reminds me of a tropical paradise somewhere :)
1st grader - Love the colors in this one :)
1st grader - Great patterns in the stripes and a fabulous background!
1st grader - another great example of patterns within the stripes. The other students were highly impressed with this version. They kept complimenting the student on a job well done. It was super cute!


